Subject: Return of Rustpuppy report 1 (Rustpuppy Log report 18)
Date: Wednesday, January 19, 2000 9:19 PM
A lot of water has gone under the dam since the last Rustpuppy Log report. After the “Knock from Hell” started I have been deprived of my precious seat time.
In
desperation to get Rustpuppy back on the road I tore into the 400 motor stored
in my shop waiting to be built up for the Junkyard Dawg in a future
project. I was thinking that if
the 400 was in as good shape as described by the previous owner I could just do
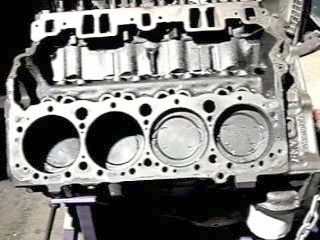
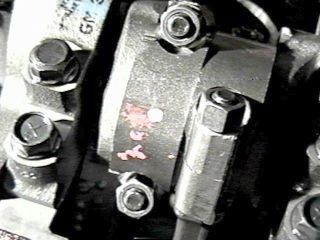
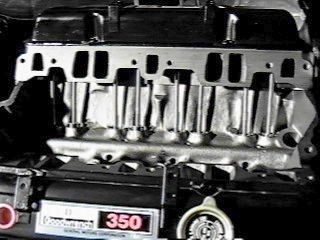
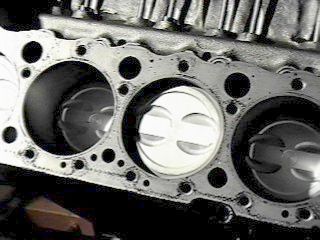
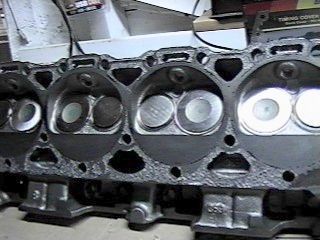
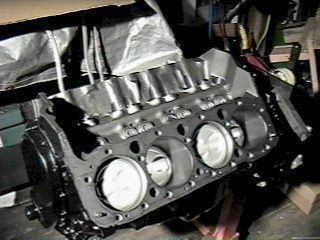
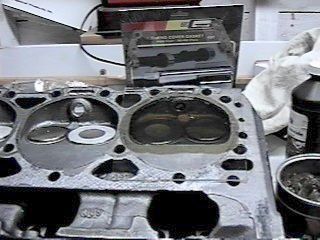
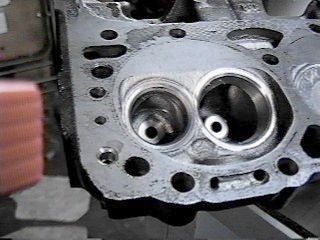
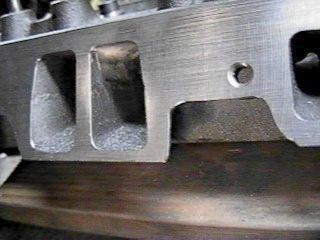
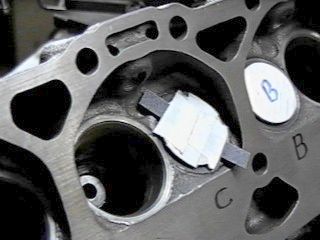
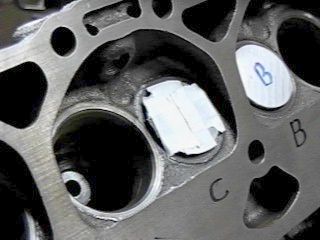
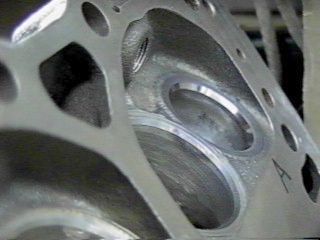
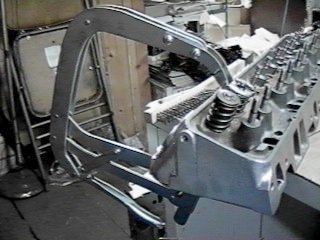
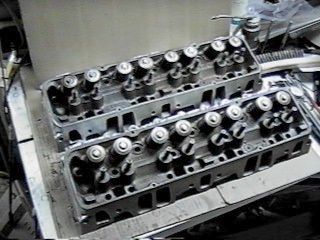
a quicky rebuild job and then pop it into ol’ Rustpuppy. But that plan was not to be. When I pulled one of the heads on the
400 I was presented with bad news on top of more bad news. The 462624 heads had teeny weenie
little 1.72 valves and the bores showed almost 0.020 wear. (bellmouthing on the
thrust faces) (ror1-4.jpg)
I
decided then and there that drastic measures were called for to allow “The
Return of Rustpuppy” to take place in a reasonable time.. I had read and was intrigued by the
five part series in Chevy High Performance magazine about building up a bottom
of the line Goodwrench crate motor.
(Sept, Oct, Nov, Dec, 1999 and Jan 2000) And with the extra Christmas dough I just got I could afford
(probably kidding myself) to “invest” in a brand new motor for ol’ Rustpuppy.
On the 4th
of January I ordered it from Sallee Chevrolet (1395 plus about 170 bucks
shipping) and on the following Monday (the 10th) I picked it up in
town at my local NAPA store which kindly allowed me to have it delivered at
their loading dock. Tracy and
Scott (who also has a bad back) manhandled the 475 lb crate down from their
lowest dock to the tailgate of my Suburban in the rain. (about a 13 inch drop)
Tracy
(the only non-cripple) was below catching and me and Scott just pushed the
motor off the dock. Tracy managed
to catch it and his face did get red, his eyes popped a little and he made some
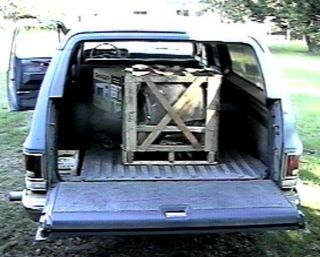
strange noises but the motor was safely down. Then we slid it inside the rear of the Suburban out of the
rain and the task was done!
The
Goodwrench motor has been lurking in the back of the Suburban ever since the 10th
as the weather really turned bad last week (19 inches of rain in 9 days) and I
have been slowly clearing away stuff to allow room for the cherry picker to
find it’s way from the back of the shop to the front door. Progress has been made and any day now
the motor will be home on the engine stand..
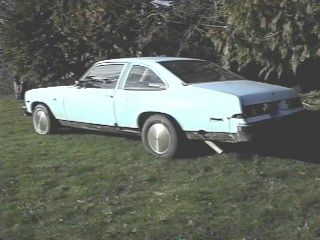
The
weather broke for two days and I managed to get about 2 minutes of seat time
when I moved Rustpuppy from in front of the shop and parked her up by my dying
cedar trees. She looks sad
and neglected up there.
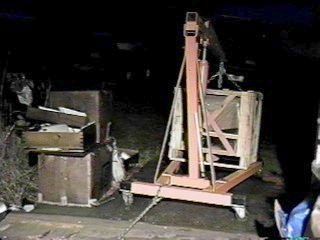
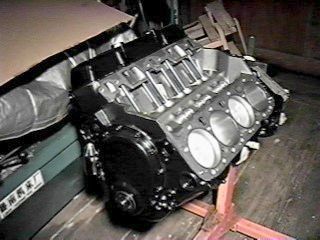
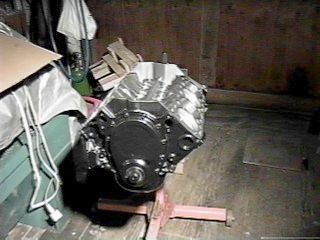
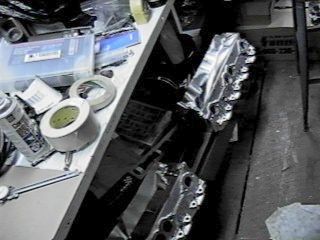
(ror1-2.jpg) But the
Suburban has the place of honor in front of the shop and is backed in close
ready to have the motor moved out..
(ror1-1.jpg)
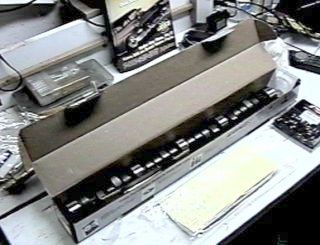
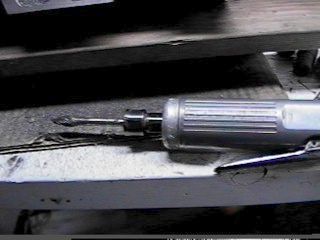
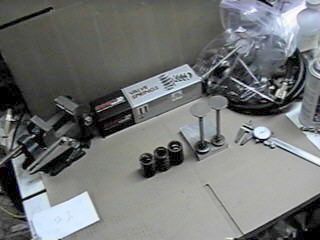
Monday
this week (the 17th) in a package from Jeg’s some gaskets, valve
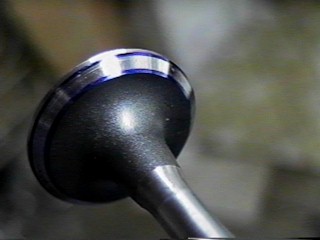
seals, and my CompCams XE268 came.
What a work of art it is!
(ror1-3.jpg)
I have
been considering milling the heads of Rustpuppy’s Goodwrench motor when I have
them off doing the pocket porting and valve spring replacing but close
technical scrutiny convinced me to leave them alone. To do it right involves more modifications than I want to
make (milling the manifold and block) and I do not want to do it in a
half-baked way. (and I don’t mean
baked..)
Just
putting in the thin Fel-Pro head gaskets will raise the compression by .4
points (from 7.8 to 8.2) and that will have to be enough.. I had targeted 8.6 to one but
will be happy with 8.2..(with the crappy gas we have here you need a much more
high-tech cylinder head to have higher compression, like a Vortec for instance)
On a
different happy note the five part series on the “Goodwrench Quest” from Chevy
High Performance has been scanned
in (by me) and Ray Buck is getting it together to have available to all on the
Rustpuppy web site. It is not
ready yet but will be soon.
More to
come...
Rick
Draganowski
(Goodwrench
is good)
Subject: Rustpuppy Run
Date: Sunday,
January 30, 2000 6:34 PM
I
promised the list pictures of the “Rustpuppy Run” where all of Rustpuppy’s
G-Tech Pro measurements were made.
The first picture (run.jpg) is the beginning (you might see some
“Rustpuppy Tracks” if you look close) of the .7 mile causeway on Hwy 101. The second picture (run2.jpg) is about
at the quarter mile mark where the speed is highest. The round bush looking thing on the right is a 20 foot tree
growing next to the causeway. No
shoulders or guardrail..
Scary at
times..
Rick
Draganowski
(fun
though..)


Subject: [nova] Dyno2000 to Goodwrench dyno comparision
Date: Monday,
January 31, 2000 11:49 AM
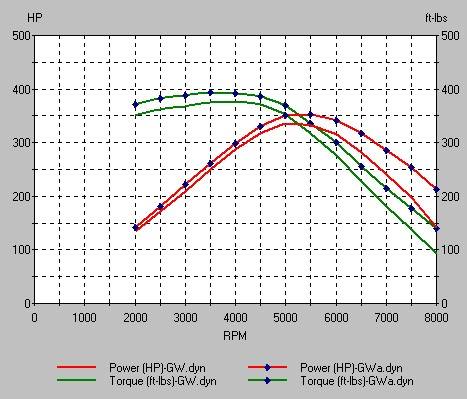
I messed
about with Dyno2000 to simulate the Goodwrench motor built up in the Chevy High
Performance article. A few minor
changes in the flow file brought
the peak horsepower to about the same point. Here is a crude hand made chart of a correlation between the
numbers from the simulator and the numbers from the actual dyno runs.. (goody2.jpg)

The dots
are the data points from Dyno2000 the x’s are data points from the actual dyno
runs.
Rick
Draganowski
(not too
bad..)
Subject: Connecting rod
Date: Tuesday,
February 08, 2000 1:38 PM
Sometimes
something so weird happens that you expect Rod Serling to step from behind the
curtain and start talking about “a place not of Sight or of Sound but a place
of Mind.”
It
happened to me day before yesterday.
I was
taking the oil pan off Goody (Goodwrench crate motor) so I could replace the
timing cover correctly after transplanting the cam with the XE268.
I had
the motor inverted on the stand to make it convenient.
I
removed the bolts and unstuck the pan.
I pulled
it off..
I looked
down..
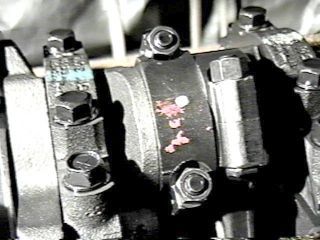
And saw
this..... (rodcap.jpg)
Rick
Draganowski
(Whaa?????)
Date: Wednesday,
February 09, 2000 1:58 PM
As the
list knows I overreacted to the strange (to me) appearance of the connecting
rods in Goody. Got a good tip from
Christian that the funny looking (and ugly at first sight) rods may be the new
GM high tech powdered metal rods.
Luis and Larry mentioned that they had encountered them.
So I did
some research last night and found out the following:
On the
GM crate motors the PM rods (#10108688) are alternate parts with the old forged
rods on the 190(Goody) and 285hp motors.
(they are looking better to me already)
The old
350HO 300hp used them as alternates as well as the new 350HO 330hp (Aren’s new
motor). So Aren’s motor may have
them. (starting to look more
attractive all the time)
Then the
ZZ line of performance motors shows them as alternates on the ZZ3 and the only
rod specified for the ZZ4 and the ZZ430 (same part number as Goody’s
rods).. Wowza! (they are looking drop dead gorgeous to
me now)..
GM
decide to drop the old weak forged rod in favor of the fantastic new high tech
powdered rods in the LT1 and the LT4 as well (different design on those motors,
longer..)
So the
ugly ducklings have really turned into swans for me.
Beautiful, aren't they?
Rick
Draganowski
(research is
good)
Date: Saturday,
February 12, 2000 4:26 PM
The
attached graph from Dyno2000 shows the expected output of “Goody” (modified
Goodwrench motor) and I am really lookin forward to getting it done and into
Rustpuppy.. (goody1.jpg)
Here is
what she is..
New
Goodwrench Universal 350 Crate motor with..
0.040 milled
off heads and
0.017
thinner head gasket putting compression from
8 up to 8.9
and with
custom porting of stock heads (done by me, in process now)
and with a CompCams
XE268 with matching valve springs and
Performer
intake
and DynoMax
Ceramic full headers.
and
supertuned 750cfm QuadraJet carb
The
graph shows curves both with mufflers and with headers open..
Rick Draganowski
(350 horses for the Rustpuppy!... Yowza!..)
Subject: Return of Rustpuppy report 2
Date: Saturday,
February 19, 2000 7:43 PM
We left
the story with the brand spanking new Goodwrench Universal 350 crate motor
(Goody) sitting in the back of my Suburban in front of my shop being rained on
bigtime.. I spent much time
re-organizing my (cluttered to the point of insanity) to be able to move my
cherry picker from it’s parking place straddling the stored 250 six (original
motor out of Rustpuppy) and over to the front sliding door. (my shop is a converted (not much) old
sheep barn that was built in 1943 out of lumber stolen from the Government
(salvage from a Liberty ship that shipwrecked in front of our place))
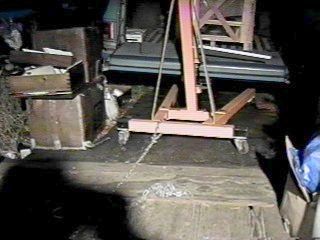
About
the time I got the crane moved the weather broke for a couple days and I sprang
into action. Attaching a chain to
the lifting eyes provided by GM and putting a long chain with the come-along in
the middle on the rear of the crane prepared the scene. The come-along and chain is so I could
winch the crane carrying the motor up the ramp in front of the door. I had practiced this technique when I
pulled the motor salvaged from my junked pickup and transplanted it into
Rustpuppy. The extraction went
without incident and after what seemed like hours of fooling around Goody sat
still crated in my shop.. The
excitement was building..
Then I
slowly (taking lotsa pictures) opened the crate keeping it almost intact and
just unwinding the sides.
Goody sat in solitary splendor on the wooden pallet thingie that makes
up the bottom of the crate.
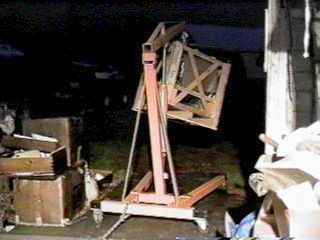
Then I
maneuvered the crane around to pick Goody up leaving the pallet below. After removing the pallet I
realized that Goody was turned around so the bellhousing end was toward the
crane.. No good as I needed her
rotated 180 degrees so I could put her on the engine stand. So then I fetched the pallet and
returned it to under Goody and let it back down so I could put a 180 degree
twist in the lifting chain.
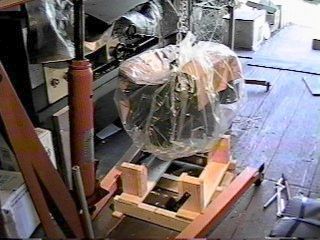
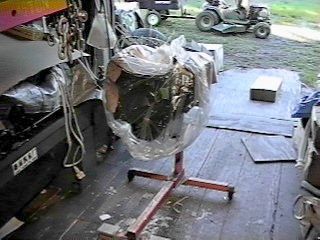
That
done the next time I lifted Goody I held it so the rotation was controlled and
it turned 180 degrees slick as a whistle. Then I opened the plastic bag just enough to bolt the
engine stand bracket and pivot thingie to Goody. Raising it higher and rolling the engine stand forward I was
able to slide the bracket into place and Goody was where she will be till the
modifications are done and it is time to put her into Rustpuppy.
(ror2-1.jpg,
ror2-2.jpg, ror2-3.jpg, ror2-4.jpg, and ror2-5.jpg show the sequence)
So here
I have a brand new motor to replace the old pretty used up and knocking
salvaged motor (I think 80k miles in a truck carrying a heavy camper and
pulling an Airstream trailer broke it in good) in Rustpuppy.
So what
do you think I start doing?
Right. Take it apart.
Stay
tuned for “The Return of Rustpuppy report 3”
Coming
soon to a Nova List near you..
Rick
Draganowski
(real soon
now)
Subject: Return of Rustpuppy report 3
Date: Friday,
March 03, 2000 8:15 PM
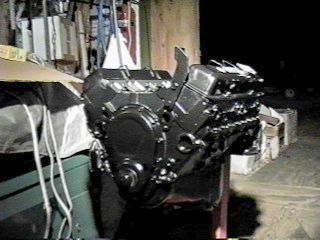
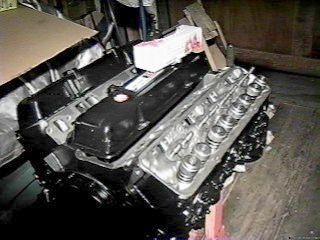
We left
the story with the pristine untouched and fully warranted by General Motors for
3 years or 50,000 miles Goodwrench Universal crate motor (Goody) on the engine
stand. (ror3-1.jpg and ror3-2.jpg) Naturally that condition will have to
change..
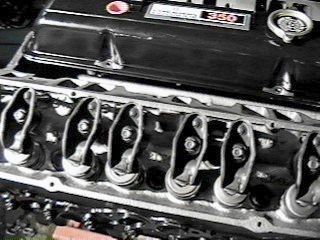
So I
proceeded to pull the valve cover and behold the new-age self centering
rockers. Strange to see but I
suppose they work.. (ror3-3.jpg)
Then the rockers came off and with the
ball and nut as well as the pushrod put into little freezer bags.
The
headbolts seemed strange. Large
flanged heads with tiny ½” hex heads.
In any case my half inch drive breaker bar followed by the small air
wrench made short work of them.
The headbolts were sealed into the threads with the teflon paste stuff I
have been hearing about. Gotta get
some of that.. The torque on the
headbolts seemed uniform and correct..
(bet they use a computer controlled assembly torque measuring assembly
wrench)
It
seemed very strange to be taking apart a brand new motor with everything
looking so nice.. Not at all what
I am used to and quite pleasant..
This is really the luxurious approach to rodding and I have always been
stuck at the poverty end in the past. (credit cards is good)
I hope I
don’t get spoiled as the 350 with the knock in Rustpuppy now and the 400 on the
floor in the corner are not clean and new inside.. (too many projects is good)
I have 7
pictures of this report coverage and they will be attached here. (ror3-4.jpg, ror3-5.jpg,
ror3-6.jpg, ror3-7.jpg, ror3-8.jpg, ror3-9.jpg, and ror3-10.jpg)
Enjoy,
Rick Draganowski
(new motors is good)
Subject: Return of Rustpuppy report 4
Date: Saturday,
March 04, 2000 9:50 PM
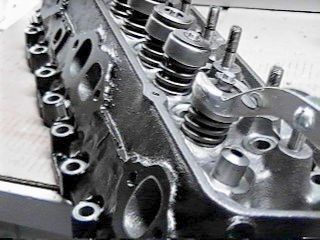
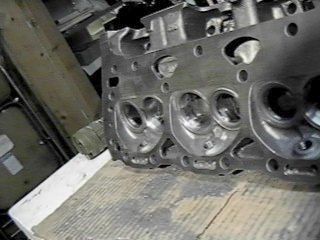
We left
with the heads off of Goody and plenty more to do. The same day the heads came off I checked the cc
measurement. 76cc! Surprise! (ror4-3.jpg, ror4-4.jpg,
ror4-5.jpg, and ror4-6.jpg)
Next I
pulled the valves and bagged them with the springs and keepers. (ror4-7.jpg)
Then I
took the now stripped down heads and put them in the Suburban with plans to
take them to the machine shop for the milling job. I originally planned to take 0.040 off the heads and then
changed my mind twice which left me back where I started. I expect to get 8.6 to 1 compression
versus the 8.4 to one the Chevy High Performance guys had. They only milled the heads
0.020... I expect just a dab more
performance and have been using the 8.6 number in almost all of my simulations
over the last year or so..
I got to
town the next day and dropped the heads off with specific instructions. I told Scott to try to get the
smoothest finish on the job since I would be using the picky Fel-Pro rubber
coated shim gaskets.. The next
morning I called at about 9:30am to verify the amount that Scott was going to
take off the intake faces to let the manifold fit properly. He wasn’t in yet.. I called again at 10 and then at
10:30.. Then I was busy for a
while and called the last time at 11:45..
He was finished already! I
verified that he took off approximately the right amount on the intake faces
(bout the same as the milling 0.042 and I wanted 0.039 based on my engineering
drawings..) Close enough for
Government work.. That afternoon I
came up with a good excuse to make another trip to town and pick them up..
Like
everything else in life they weren’t perfect (you could still see milling marks)
but they looked good enough if I use the spray CopperCoat gasket sealer..
I wanted
to get the CompCams XE268 in place and the motor buttoned up so I could get the
painting done. I am painting the
motor silver with Oldsmobile blue valve covers, manifold and accessories..
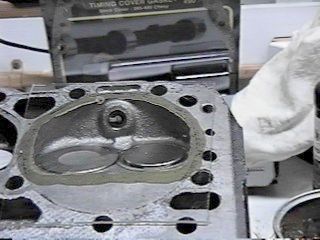
Before I
started on the porting job on the heads I had one warmer day and used it to
pull off the timing cover. GM must
have learned a bit of a lesson as the timing set was the heavy duty stock model
with the wider silent chain and the cast iron cam sprocket and powdered metal
crank sprocket. (ror4-1.jpg)
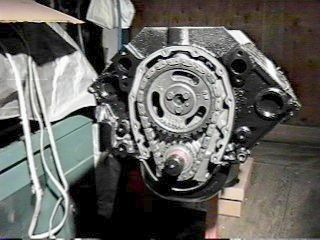
High reliability stuff compared to the
el-cheapo timing set with the skinny chain and the damn plastic coated aluminum
cam sprocket which came in the 79 Target Master motor in Rustpuppy.
The
stock cam was out in a jiffy. ( I noticed that the oil holes in the cam
bearings were at random alignments.
They must have put an annular grove in the bearing bores so the
alignment is not important.
Simplifying assembly is good.
I was a
little bummed out about two things I found at this stage though. The first one was the torque on the
bolts holding the cam sprocket to the cam. They were just too loose in my opinion. And the second one was that three of
the cam lobes were dry as a bone with not a trace of break-in lube. Somebody is not doing their job..
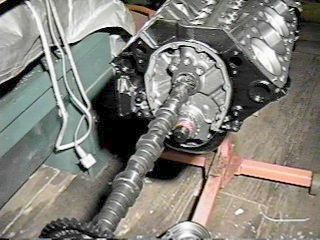
Oh
well.. The XE268 went in smooth as
silk. That is it posed in the
picture. (ror4-2.jpg)
I put lots
of break in lube 360 degrees on each and every lobe.. I don’t need no more stinking flat cams!.. I will put a liberal gob of the lube on
the business end of the lifters when they go in as well.. It was so easy and such fun doing the
cam swap on the engine stand compared to the one I did on Rustpuppy with the
motor in the car that it seemed to be over nearly as soon as I started.. Engine stands are good..
I had
ordered the Standard Abrasives Deluxe porting kit from Northern Auto and was
set for the pocket porting. I had
flanged together a air pressure regulator and flexible hose pigtail for the die
grinder and was all set except for one thing.. The weather..
We started having unnaturally cold weather and I could not function well
in the 40’s to low 50’s in the shop.
I picked around for what seemed like weeks (was weeks) doing a little at
a time until just recently when I declared the heads finished and ready to
go.. (ror4-8.jpg, ror4-9.jpg,
ror4-10.jpg, and ror4-11.jpg)
During
this time I took one picture of poor forlorn Rustpuppy. (the sun came out for a
minute) (ror4-rpup.jpg)
I really
hate having to drive only the Suburban.
I stomp on the gas and the poor thing does it’s very best but it is a
bloated cow and will never be a runner..
(17.9 @ 78)
(210 horses hauling 6000 lbs is just not the same)
More to
come...
Rick
Draganowski
(painting
now..)
Subject: Return of Rustpuppy report 5
Date: Sunday,
March 05, 2000 10:36 PM
This is
more of a cleaning up of missed items than a progress report.
I had
omitted to include the traumatic experience of the unusual (to me) looking
connecting rods in Goody. After
scaring me with their unusual appearance they turned out to be the new powdered
metal rods used in new motors including the excellent ZZ430.. Ror5-1.jpg is the last picture I took
while the pan was off. I pulled
the pan to properly seal the front of the motor since I had pulled the timing
cover to swap out the cam..
Rort5-2
is a nice picture showing a little of the pocket porting I did. (it was a fun
learn-by-doing experience for me)
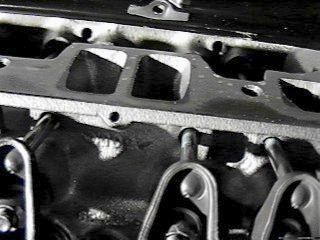
Ror5-3
shows the large bosses or lumps in the intake ports (they are there to prevent
the rocker cover bolt holes from penetrating into the intake runner if the
cores shift a little.)
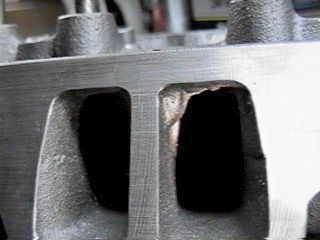
I used the carbide burr on the die
grinder (ror5-4) to make them ugly bumps just a bad memory. (ror5-5)
Ror5-6
is the before and ror5-7 the after pictures on the neat silver paint job on the
heads. They look even better than
these pictures show..

NAPA
Commercial Coatings Silver in a rattle can is the stuff.. It takes a long time to properly set up
in the cold weather (recommended 70 degrees) so I have the heads sitting on top
of my puny little 500w electric heater (ror5-8) ..
(see those cracks in the floor, they
open to the out-of doors and a cold draft comes up through them)
More to
come...
Rick
Draganowski
(silver and
blue is good)
Subject: Return Of Rustpuppy report 6
Date: Thursday,
March 09, 2000 8:55 PM
This
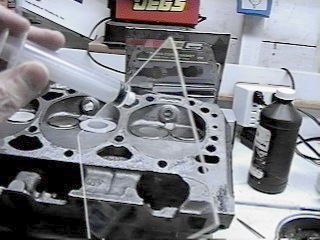
installment is about valve springs and exhaust valve rotators. I measured the difference in room
allowed the valve spring between the plain retainer and the rotator. I measured first from the end of the
valve to the face of the retainer where the spring seats. The rotator measured 0.109 farther from
the end of the valve than the plain retainer. (see pics ror6-1 and ror6-2)
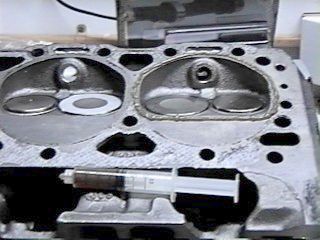
Then I
measured the actual dimension in the head with the valves and retainer/rotator
and no springs. (see pic ror6-4).
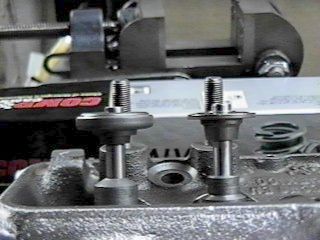
The
plain retainer has 1.75 inches for the spring and the rotator has only 1.64
inches.
The
three springs in picture ror6-3 are, from left to right, the stock exhaust
spring, the stock intake spring, and the CompCams 981-16 spring recommended for
the XE268 cam I am using in Goody.
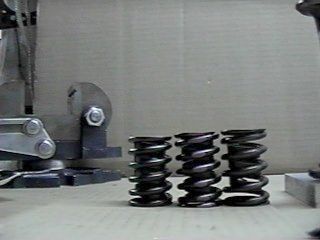
Note how
short the inner flat damper spring is on the CompCams spring. It is the limiting factor on the stock
valves. I used the vise to compress the three springs and measure the coil bind
dimension (fully compressed).
I was
amazed to see the stock exhaust spring bind at 1.212” due to the long damper
spring.. This means that the
stock exhaust spring (using the rotator with an installed height of 1.64) is
jammed solid at 0.428 valve lift. This is weird as the stock LM-1 cam in Goody
has a 0.401 lift. Just 0.027 clearance.
The
stock intake spring (with 1.75 installed height) is coil bound at 1.095 which
means that it will not bind solid until 0.655 lift.
The
CompCams 981-16 spring is coilbound at 1.090 which binds it (at the installed
height of 1.750) solid at 0.660 inches.
The spec for the CompCams spring is to have an installed height of 1.70
inches so I need to use 0.050 shims to bring it up to spec..
Now for
something entirely different.
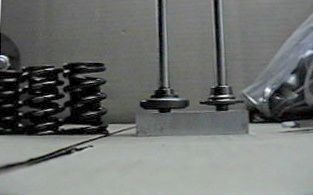
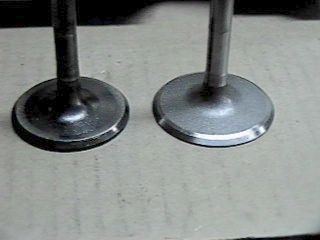
The last picture (ror6-6) shows a salvaged 1.84 intake valve from a 305
next to one of Goody’s 1.94 intakes.
I had wondered why when Chevy High Performance had the valves back cut
with a 30 degree angle they only did the exhaust valves. It seems that word had gotten out and
the neat 1.94 intake valves in Goody came from the factory with a 30 degree
back cut already.. How about
that...
More to
come...
Rick
Draganowski
(back cut
valves is good..)
Subject: Return Of Rustpuppy report 7
Date: Friday,
March 10, 2000 10:35 PM
I moved
on to the next step, the back cutting of the exhaust valves. I decided to polish and check the exhaust
valve seats and mark the valves with the seat pattern so I could back cut them
without worrying about narrowing the seating area. Most of the heat that builds up in the exhaust valve is
heatsinked off at the valve seat.
That is why the exhaust valve seats are normally much wider than the
intakes. Polishing them makes them seal better but really makes them cool the
valves better..
The
ror7-1.jpg and ror7-2.jpg pictures show the rig I used to polish the seats.
(one shown polished in ror7-7.jpg)
I taped a narrow strip of 240 grit wet-or-dry silicon carbide paper
to the actual valve I planned to use in that port and then rotated them with electric drill fitted with a
bit of fuel line (5/16”) (see ror7-5.jpg)

Then
using a felt tipped marker (ror7-3.jpg) I coated the valve evenly and then inserted it and pressed it and
rotated it by hand to mark the seat area. (ror7-6.jpg)
Then using the setup on my lathe shown
in ror7-9.jpg I slowly ground the 30 degree back cut.
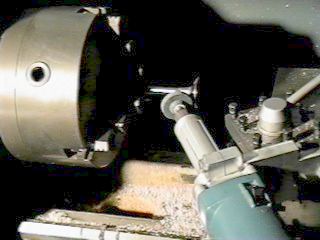
It is a
tricky standing up and watching closely operation so I only managed to finish 4
valves (one head) before my back started hurting so bad that I left the other
for tomorrow..
More to
come...
Rick Draganowski
(looking
forward to a lot of progress on Goody this weekend..)
Subject: Return Of Rustpuppy report 8
Date: Monday,
March 13, 2000 10:50 PM
We left
off in the middle of the exhaust valve backcutting. I finished the job on Saturday and pressed on to the
installation of the CompCams springs and salvaged retainers (from a scrapped
305) to replace the rotators.
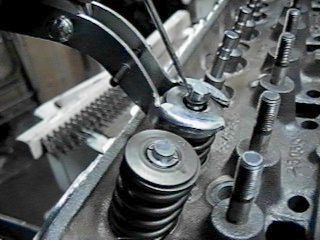
First I
measured the clearances to be sure the .477 intake and .480 exhaust lift would
be compatible with the stock valve guides and seals. No problem at all on the exhaust side but the neat intake
valve seals looked like trouble.
When I installed the first one by hand (tough to do) the clearance
between the seal and the bottom of the retainer was only 0.460.. (ror8-1.jpg)
Damn! I
thought to myself and it is Sunday too... I sat and stared at it for a while
and then measured one of the seals which was off and one of the guides with no
seal and figured that they might work if the seal was really down all the way
snug on the top of the guide..
Then
with little to lose I tried this.
With a small ball peen hammer and the hardwood handle of a wire brush I
gave a few smart raps on the valve stem with the keeper and locks in place to
smack the seal down hard. It
visibly moved from what I thought was fully seated and when I measured again I
had 0.490 clearance. After the
seal relaxed from the shock the clearance shrank to about 0.480 but that was
just fine as worse case..
I went
ahead and installed the rest of the seals and verified the measurements on them
all. No problem. I was careful to reinstall the little
o-ring seals (sealing the retainer to the valve stem to keep oil from running
down the stem) (ror8-2.jpg, ror8-3.jpg, and ror8-4.jpg)
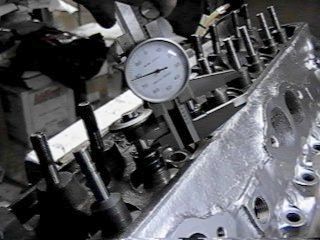
With the
heads together I went back and checked the cc volume of the combustion chamber
to verify what the 0.040 head milling had done.. It was neat to find a volume of 69cc.. I had expected 70 but that was just a
close approximation based on area measurements of the 400 head..
While
fooling around with the heads I verified the exact casting number.
Chevy
High Performance has the number wrong in the Goodwrench Saga series. They have it as 83417338 but it is
really 93417369.. The nines on the
ends do look like eights since the casting is pretty rough but I did a really
close inspection on both heads and they are definitely nines..
More to
come...
Rick Draganowski
END OF
CHAPTER 1
![[ Back Button ]](../gif/t_back.gif)
![[ Go Home Button ]](../gif/t_home.gif)
![[ Next Button ]](../gif/t_next.gif)