Subject: Return of Rustpuppy report 17
Date: Thursday,
June 08, 2000 10:22 PM
This part
of the adventure was getting the distributor in and set for the initial startup
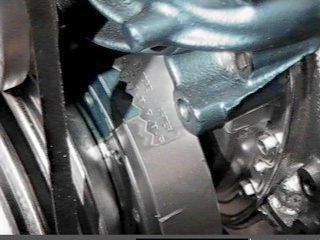
of Goody. I have Goody set on TDC
firing stroke of number one. (ror17-1.jpg)
Then a surprising thing happened when stabbed the
distributor randomly just to get it in.
It went in all the way!
Sort of winning the oil pump drive shaft lottery with the first
ticket.. Cool.. Greg Colletti in his “Rebuilding Your
Engine” video from KLK Productions shows his technique of rotating the oil pump
shaft to position the rotor in the correct place without using anything other
than the distributor. You pull it
out, rotate it 180 degrees and then reinsert it. It catches the driveshaft and rotates it half of a
tooth. Then by repeating the
pulling, rotating, and reinserting as many times as necessary the direction of
the rotor turns one tooth for each two stabs counterclockwise.
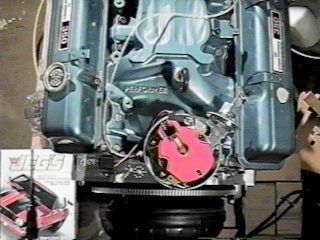
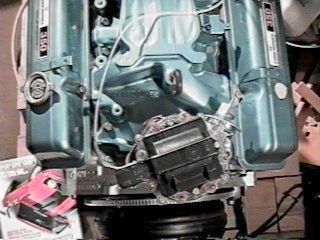
My
random lucky insertion was about 4 teeth off so eight pulls and stabs had the
rotor pointing in the direction of number one sparkplug..(ror17-3.jpg)..
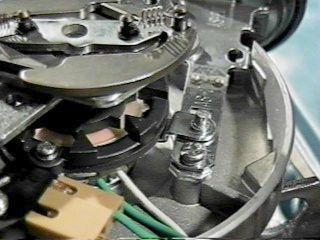
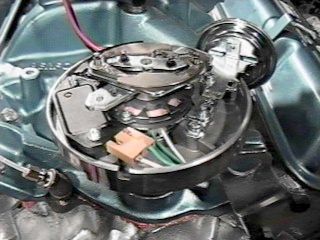
Then I set the initial timing by eyeballing the reluctor
points to give me about 8 degrees of advance. (ror17-5.jpg) It looks like the rotating part of the
reluctor is about 1/16” clockwise from the fixed part when it is close to
right..
Then I
locked down the distributor using the stock hold down bracket with the spiffy
slotted hole and no chrome..
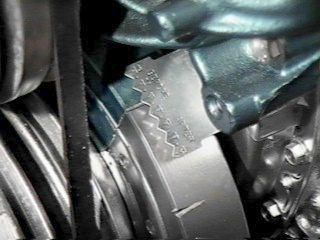
Rotating the motor till the reluctor points lined up exactly showed just
about exactly 8 degrees BTDC on the initial timing.. (closer than I expected..) (see ror17-6.jpg and
ror17-7.jpg) The last
pic shows how the distributor looks with the cap on.. (ror17-2.jpg)
More to
come..
Rick
Draganowski
(taking
my time cause too much else is happening around here..)
Subject: Return of Rustpuppy report 18
Date: Friday,
June 09, 2000 6:48 PM
The long
awaited Dynomax ceramic coated headers arrived. It was amazing the difference it quality between the 210
buck Dynomax ceramic versus the 140 buck el cheapo FlowTech ceramic headers I
bought for Rustpuppy 3 years ago..
The ceramic is much thicker and looks much more like chromium plating
than the dingy old ones (which are rusty beyond hope)..
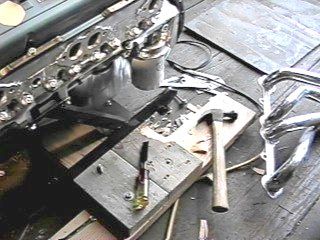
A trial
fitting showed that they interfered with my test stand on both sides. Moving the rear support forward
provided enough room for the passenger side to clear. But it took some serious chiseling to get room for the
drivers side.. (see ror18-1.jpg, ror18-3.jpg, and ror18-4.jpg)
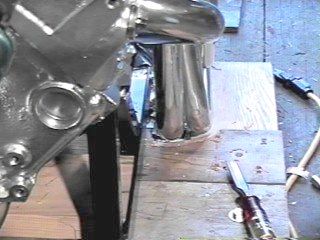
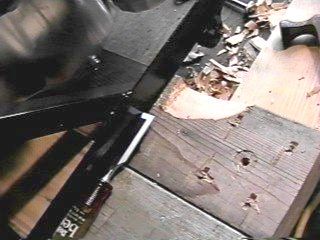
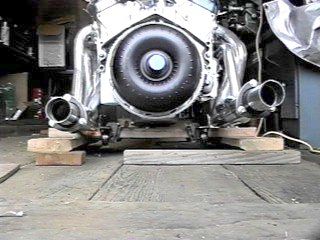
Hmmm.. The driver side collector is too low and
the passenger side collector is too high.. On average it is just right.. (see ror18-5a.jpg)
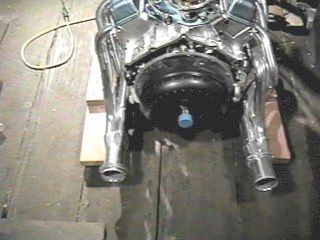
And the passengers side is pointing to the right instead of
straight back.
(see
ror18-6.jpg)
But
problems are meant to be solved and they still look damn good to me...
Next on
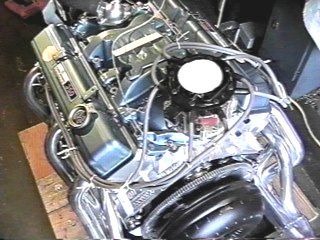
the agenda was putting the premium NAPA silicone plug wires on. I used a bunch of garbage bag twisties
to hold it together while I puzzled over which length wire went where.. ( I will be putting the ty-raps on
tonight..) (see ror18-8.jpg)
I have a
set of Accel universal wires (bout 24 bucks from Jeg’s) but I took one look at
the Accel stuff and gave it a pass.
You need a special crimper, the terminals looked pretty cheap, and the
bright yellow color looked kind of stupid to me.. The subtle gray with black boots of the NAPA pre-terminated
ready to go jobs suits me fine..
Anyone want the Accel universal plug wires? Cheep...
Much
more to come...
Rick
Draganowski
(had a
rough week with too much work and not enough gumption or something..)
Subject: Return of Rustpuppy report 19
Date: Sunday,
June 11, 2000 11:26 PM
While
taking a break today and thumbing through the Jeg’s catalog, (not much plot but plenty of details) I
came across a page showing shims for moving the distributor up to the stock
location after head milling. Then
the thought hit me like a ton of bricks.
With the modifications I have made to Goody the distributor was sitting
about 0.085 lower than it should be.
It seemed OK when I installed it and this issue never penetrated my old
brain till I saw the shims in the catalog..
“Seemed
OK” just is not going to be good enough..
Hmmm.. What to do. I will be firing up Goody as soon as
the new mufflers (2 ½” Dynomax Super Turbos) show up so there really is no time
to order in..
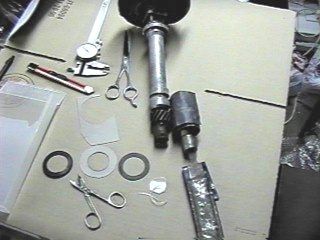
I
decided to flange up some homemade shims.
An old VHS tape box provided the neat 0.050 cross-linked polyethylene
material and a pair of iris scissors and some time provided the rest.. (see ror19-1.jpg)
Pulling
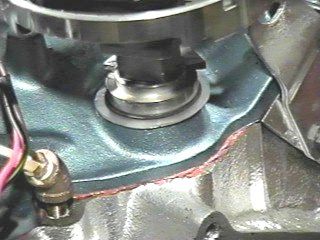
the distributor out was just the work of a moment, then in with the 0.050 shim
and an additional 0.030 gasket and the distributor went back smoothly pointing
exactly where it started from and 0.080 higher in the saddle. (see ror19-2.jpg)
I pulled
the rotor and fine tuned the 8 degrees BTDC initial timing and then buttoned
her up.
More to
come...
Rick
Draganowski
(details is
important..)
Subject: Return of Rustpuppy report 20
Date: Tuesday,
June 13, 2000 9:10 PM
Details,
details.. I went to put the
adaptor into the drivers side head for the water temp sensor. Ha! It turns out that the header on that side has to come off
first, which means the tyraps on the spark plug wires have to be cut.. And so on... I had the adaptor sitting on the bench next to where I
did the porting and thought about putting it in way back then.. but
didn’t.. duhh.. (ror20-1.jpg)
I had salvaged
the oil dipstick out of the 400 motor and a little cleaning up and a coat of
Self-Etching-Primer (my standard
coating for everything from now on..) it went in fine.. I have heard that there is
supposed to be an o-ring between the little flangie thing and the top of the
block but have never seen one. Is
that correct? (ror20-2.jpg)
I have
cobbled up wooden feet for the 3-core radiator (from the Dawg) and got the
hoses and clamps on. Then I though
about cooling air. I plan on
running Goody for quite a while on the stand so the radiator definitely needs a
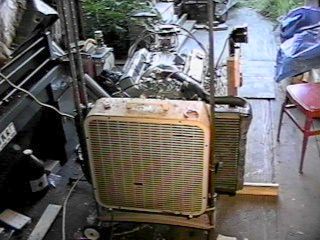
fan of some kind. I had an old
industrial grade window fan in a stand (looking rusty but runs good) laying in
the back of the back area and dug it out.
I have it pulling air in reverse flow through the radiator.. It should work since there is no real
load on Goody.. (ror20-4.jpg and
ror20-5.jpg)
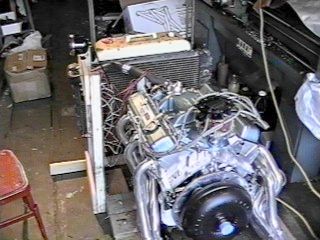
I took
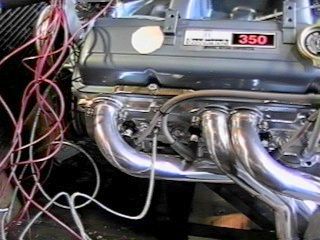
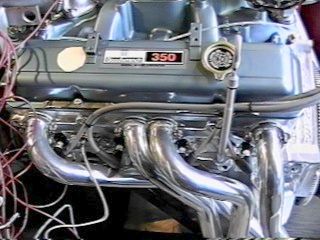
one last pic of Rustpuppy’s Target Master motor as it sits today. It will never look like this again.. (ror20-3.jpg)
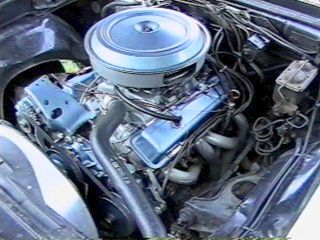
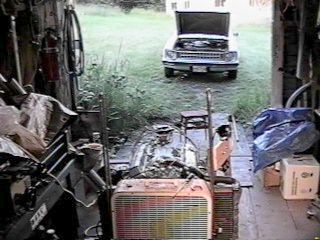
The last
pic shows Goody in the foreground and Rustpuppy in the background getting ready
for her transplant..
More to
come..
Rick
Draganowski
(two steps
forward, one back..)
Subject: First Spiderometer, now
Arachtach..
Date: Wednesday,
June 14, 2000 11:07 PM
Last
year I was complaining about the damn spider which had infested the speedometer
on Rustpuppy so it could not indicate faster than 60mph..
Well I
have had the Sun Super Tach II mounted on the console for Goody’s test stand
for about 3 weeks and today 12v was applied for the first time. The needle swung to zero as advertised
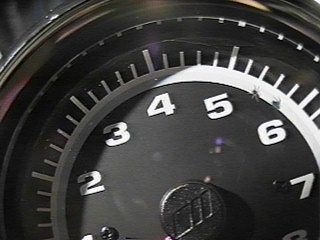
for the magnetic suspension indicator but I noticed a strange movement inside
the tach.. The attached picture
shows the intruder.. It’s web is
so fine that the needle broke it but I am sure it will keep trying..
Damn, it
is always something weird..
I think I have a plan on evicting my bothersome arachnid. The spider has an instinct to
spin a web near a lighted place which attracts prey.. I taped an opaque disk over the face of the tach with a
strong light shining on the little hole in the rear where the spider came
in. I expect by tomorrow it will
move to where I can smash it with the wires.. Ha ha ha ha...
(maniacal spider killer laugh..)
You can
see the little pest in the picture.
Spider on the left and it’s nasty little shadow on the right..
Rick
Draganowski
(infested in
Oregon..)
Subject: Die spider die!
Date: Thursday,
June 15, 2000 9:51 PM
My
theoretical solution to the tiny spider infesting my new Sun Super Tach II did
not work at all. I had failed to
take into account that spiders have even more patience than even I..
So I
took serious steps. The front
bezel is held by four little plastic lugs snapping into four little slots. I carefully pryed with a screwdriver
and eventually after about 10 minutes of fooling around popped off the bezel
and glass.. The nasty little
spider came out on the center of the glass on the inside and before she could
scamper off, the end of my right index finger spelled doom to her and all of her
wicked plans. (which including immobilizing the needle in my brand new 58 buck
tach..)
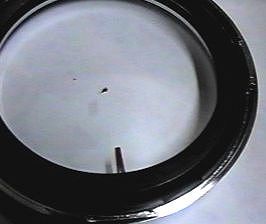
The
picture shows the body (looking rather shapeless) about in the center of the
glass... Ha!
hahahahahaha!!!!!!!
(maniacal laughter...)
It took
twice as long to get the freshly cleaned bezel snapped back into place as
taking it off. (you gotta pry in three places almost at the same time, like a
puzzle..)
Rick
Draganowski
(Rick 1,
Spider 0..)
Subject: Goody runs tonight... (I hope)
Date: Monday,
June 19, 2000 9:25 PM
I am
going through the last checklist before starting Goody on her cam breakin
maiden run..
It feels
a little like before the launches at the Space Center..
The
Astronaut’s prayer..
Dear
God, please don’t let me foul
up... (the actual word used was not foul)
Rick
Draganowski
(more to
come, I promise..)
Subject: Re: [nova] Goody runs
tonight... (I hope) (YES!)
Date: Monday,
June 19, 2000 10:08 PM
Goody
started up like a dream (cranked for less than 12 seconds).. She sounded good. Throttle responsive (almost too
responsive).. Temp went to 180
degrees and stayed there (180 degree thermostat) Oil pressure steady at 48lbs.. Vacuum at 18 inches..
Puked a
pint or so of water when I shut down since I started up with no radiator
cap. The only other issue was the
Dynomax Super Turbo’s started smoking like mad after about 10 minutes of
running.. They are coated with
some kind of clear varnish or something..
Stunk me out.. I shut down
and will run no more tonight as It is 10pm and I have to think of my elderly
neighbor lady..
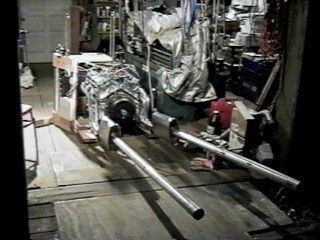
Up close
and personal she sounds gooooood!
Rick
Draganowski
(happy
happy, joy joy)
Subject: Return of Rustpuppy report 21
Date: Tuesday,
June 20, 2000 7:43 PM
As most
of you know from the posts yesterday Goody is up and running on the test
stand. I had very little time to
do anything except “real projects” today so not much has happened. I looked into the task of relocating
those stinking Dynomax Super Turbo’s to the end of the exhaust pipes instead of
the collector adaptors. I figure it
is cooler there and the mufflers would be outside instead of inside the
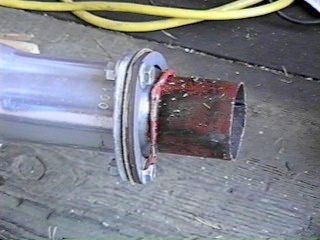
shop. I had puttied the connection
between the collector adaptor and the inlet of the mufflers with ultra high
temp RTV.. (hah!)
The
modest temperatures at this location (about 400-500 degrees F) turned the red
ultra high temp RTV into a lubricant..
I could just wipe it off after separating the joints.. So much for hype.. (see ror21-1.jpg)
I have
transplanted the super tuned (by my humble standards) Q-Jet from Rustpuppy’s
knocking motor to Goody last Friday during the G2K transits.. It is working fine but the idle is a
little off because of the much bigger cam in Goody..
Anyway
after finished the “must be done” project I started Goody up to show off to my
electrician’s helper and associate who worked with me today. He was properly impressed but during
the short run I noticed a liquid dripping out in the right front of the
motor.. I looked down and
was horrified to see fuel dripping in a stream from the fuel pump onto the shop
floor... I immediately shut goody
down. (probably took about .7 seconds
from cognition of fuel leak to switch off..) I instructed Dave to withdraw and armed myself with
the industrial sized universal dry chemical fire extinguisher 3 feet from Goody
at the door of the shop. No more
excitement followed, thank God..
Whew!
I am in
process of disassembly and inspection to determine what went wrong with the brand
new Carter performance fuel pump or perhaps the hookup. It is strange since the leak only
occurs with the motor running and when the motor is stopped the pressure is
held in the line to the Q-Jet..
There is a slight head of pressure at the inlet connection but the leak
stops when the motor stops so that joint is ok.. Another strange thing is that it did not leak
yesterday.. Hmmm.. I had packed the pump with
grease.. Maybe the gasoline
finally got through.. Hmmm..
I think
it is just a screwed up fuel pump from the factory.. Just my luck..
More to
come on this.. (I got 2 known good
fuel pumps to substitute..)
If this
fuel leak had occured in Rustpuppy after installation of Goody it could have
lead to a serious car fire..
Rick
Draganowski
(test stands
is good)
Subject: Return of Rustpuppy report 22
Date: Sunday,
June 25, 2000 7:39 PM
When I
tried to demonstrate Goody running on the test stand to a friend I noticed fuel
dribbling from the bottom of the fuel pump. Rather than scientifically deducing what exactly was
leaking (after wasting time and discomfort changing the new Carter pump with a
messed up used job) I shotgunned the problem and swapped out the pump (with a
16 buck NAPA job) and the stock steel line which leads to the Q-Jet. I used brass fittings designed for this
purpose with a taper seat on the threaded end and a hose barb on the other (5
bucks at NAPA) Then two 100%
stainless hose clamps and a piece of 3/8” fuel line. (ror22-3.jpg and ror22-4.jpg)
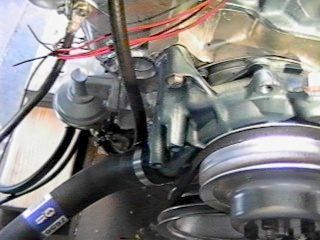
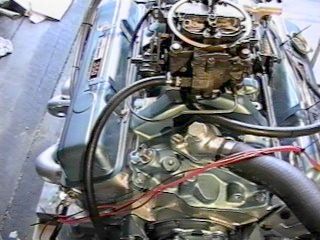
No more
leaking at all and I am happy with that..
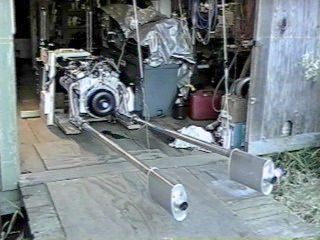
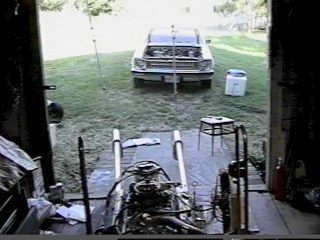
Ror22-1.jpg
is what the test stand looks like now that it is 100% operational.
Ror22-2.jpg shows the instrument console while Goody is running about 2000rpm.
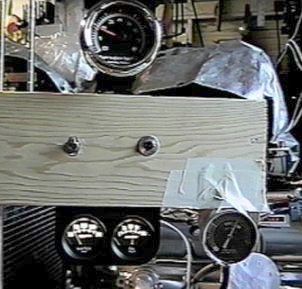
Note the oil pressure is half way between 50 and 75 lbs on
the Autometer mechanical gauge. I
am going to use nothing but straight 30w oil in Goody (with mebbe a smigen of
Marvel Mystery Oil)
Today
after what seems like many hours of important honey-do’s I got a bit of time on
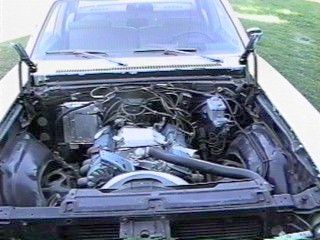
“The Project”. Off came
Rustpuppy’s rusty old hood clearing the way for the coming transplant..
See
ror22-5.jpg and ror22-6.jpg...
More to
come, even audio...
Rick
Draganowski
Subject: Return of Rustpuppy report 23
Date: Saturday,
July 01, 2000 9:21 PM
Now that
Goody seems to be running happy on the test stand the process of Rustpuppy’s
motor swap is on the front burner of Nova work.
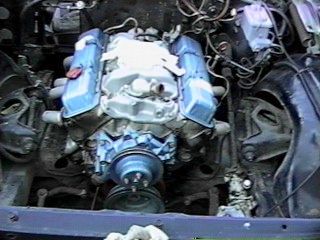
I picked
away at the old motor clearing away the distributor, alternator, power steering
pump, and fuel pump to clear the way for removal. (ror23-0.jpg)
There is
plenty of room to work in the 4th gen (Disco) Nova’s engine
room.. I wonder if I need to pull
the crankshaft pully... That
may give more clearance during the removal..
Note the
ordinary corks sealing the ports on the power steering gear to keep stuff
out.. Hydraulics is picky about
dirt and stuff..
I spent
the last couple of hours jacking and messing around to get Rustpuppy up high
enough to wedge my fat old bod under to do the necessary disconnections.. Ror23-1.jpg shows the driver’s side
header with the lowest pipe flattened pretty bad.
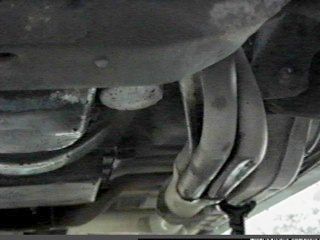
I may have bottomed just a few times (mebbe a hundred)
since the road here is pretty bad..
The passenger’s side is high and outside just like the new headers which
is encouraging as the stainless exhaust pipes may not required much mods (if I am lucky, none.. fat chance..)
See
Rustpuppy in position for her heart transplant.. (ror23-2.jpg and ror23-3.jpg)
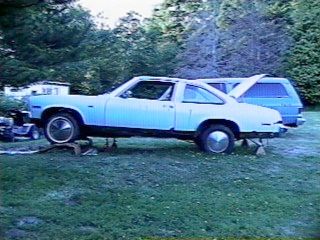
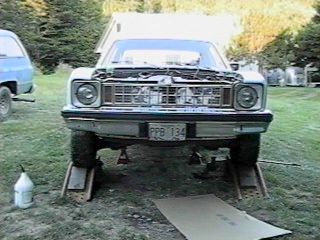
More to
come.
Rick Draganowski
(getting
anxious)
Subject: Return of Rustpuppy report 24
Date: Sunday,
July 02, 2000 10:02 PM
Today I
managed to get some of the nasty dirt in your eyes and aches in your arms stuff
done on Rustpuppy. It is amazing
how nice ol’ Rustpuppy looks on the underside as there is hardly any rust
there. All the floor pans, subframes,
and other stuff still looks good.
It is the damn salt in the air settling with the dew every night which
is doing the destruction from the top down..
Anyway,
I pulled the rear universal bolts and dropped the end of the driveshaft. I will leave it plugged into the tranny
till I find the bucket for the leak that pulling it will generate. I still have cramps in my
shoulders from working overhead.
Rustpuppy is only high enough to just clear my fat old cripple bod so
the working conditions under there are miserable..
Then I
attacked the header adaptors.. Not
too bad, as I used stainless nuts
and bolts for the installation three years ago and this end of Rustpuppy is
higher.. It still took 40
minutes for them 6 bolts though..
The installation of the exhaust system was well done by my exhaust guy
as the gaskets were perfect with no leaks..
I can
pull the drivers side header with no problems (just take no. 5 spark plug) so
out it came. It looks pretty gory
on the bottom (not hundreds but thousands of bottomings) and I will send
pictures in the next report.
The passengers side header will come out next time as I have to
disconnect and pull the starter first. Maybe tomorrow..
Progress
is slow but even getting a little done makes me happy..
Also I
am starting up Goody and running her a little every day to keep my attention
focused..
No
pictures (not that much to see this time..)
More to
come..
Rick
Draganowski
(still have
dirt in my left eye)
END OF CHAPTER 3
![[ Back Button ]](../gif/t_back.gif)
![[ Go Home Button ]](../gif/t_home.gif)
![[ Next Button ]](../gif/t_next.gif)